Vue Props Tutorial
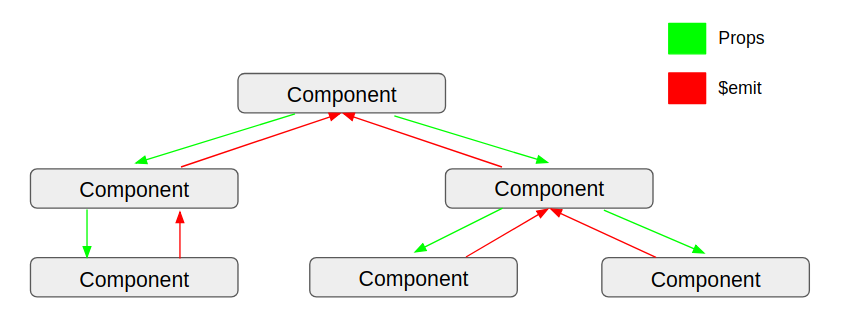
Vue props are a way for a parent component to pass data to a child component. Props are used for passing data down the component tree, to pass data up the component tree (from child to parent), you can use $emit() or Vuex.
Getting Started
When you create a component in Vue, you pass a description object. The description.props field is where you specify what props your component can receive. The easiest way is to list out your props as an array of property names.
In the below example, the greet component takes in a single prop, name. It then uses the name prop in its template.
Vue.component('greet', {
  props: ['name'],
  template: `
    <div>
      Hello, {{name}}
    </div>
  `
});

const app = new Vue({
  template: `<greet name="World!"></greet>`
});
In the above example, the Vue app passes the name prop to greet as a static prop. In other words, 'World' is a hard coded string. To pass a dynamic prop (a prop bound to a variable) you need to prefix name with v-bind: when creating the component:
Vue.component('greet', {
  props: ['name'],
  // Renders "Hello, World"
  template: `
    <div>
      Hello, {{name}}
    </div>
  `
});

const app = new Vue({
  data: () => ({ value: 'World' }),
  // Note the `v-bind:` prefix. If you forget it, `greet` will treat
  // 'value' as a raw string and render "Hello, value"
  template: `<greet v-bind:name="value"></greet>`
});
Prop Validation
Vue has built-in prop validation. That means you can check whether a prop is the right type or whether it is set. Keep in mind prop validation only works in development mode. It is excluded from the minified production version.
Below is an example of using prop validation. Note that Vue only prints a warning, it does not throw an error if you pass a non-string name prop.
Vue.component('greet', {
  // Note the slightly different syntax. When doing validation, you set
  // `props` as an object with the prop names as the keys.
  props: {
    name: String
  },
  // Renders "Hello, 42"
  template: `
    <div>
      Hello, {{name}}
    </div>
  `
});

// Prints a warning:
// Invalid prop: type check failed for prop "name". Expected String
// with value "42", got Number with value 42.
const app = new Vue({
  data: () => ({ value: 42 }),
  template: `<greet v-bind:name="value"></greet>`
});
Change Tracking
It is important to note that props are one-way only. If you change the value of a prop in a child component, those changes will not bubble up to the parent component.
For example, suppose you have an input in the greet component. If the user types in the input below, value will not change.
Vue.component('greet', {
  props: ['name'],
  // `name` will be 'World' initially, but changes will **not** affect
  // the parent component.
  template: `
    <div>
      <input v-model="name"></input>
    </div>
  `
});

const app = new Vue({
  data: () => ({ value: 'World' }),
  // `value` will always be 'World', `greet` cannot modify it.
  template: `
    <div id="rendered-content">
      <greet v-bind:name="value"></greet>
      <div>
        Value: {{value}}
      </div>
    </div>
  `
});